|
|
Direct Arterial Blood Pressure Basics |
| |
|
| |
Dr.
Bob Stein |
| |
|
| |
 |
| |
|
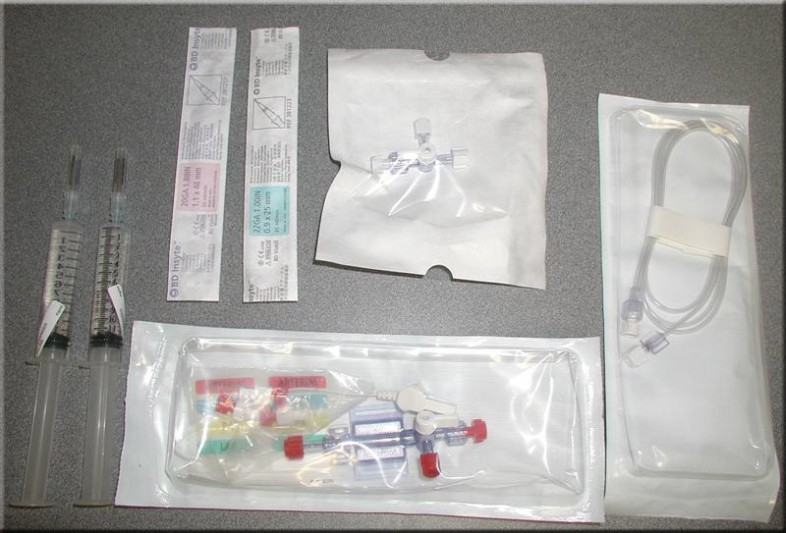
Basic needs for arterial blood pressure
monitoring include freshly mixed heparinized saline, IV catheters (20 GA,
22 GA, 24 GA), luer lock 3-way stopcock or lure lock T-port, small
diameter pressure tubing, and pressure transducer. In addition, you will
need a direct blood pressure monitor and the appropriate cable for the
transducer used. |
| |
|
|
| |
|
|
| |
|
|
| |
|
 |
| |
|
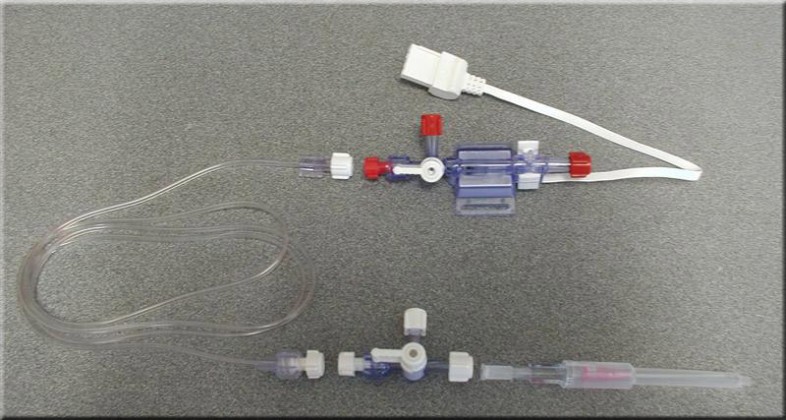
This is the basic sequence; what connects to what. |
| |
|
|
| |
|
|
| |
|
|
| |
|
 |
| |
|
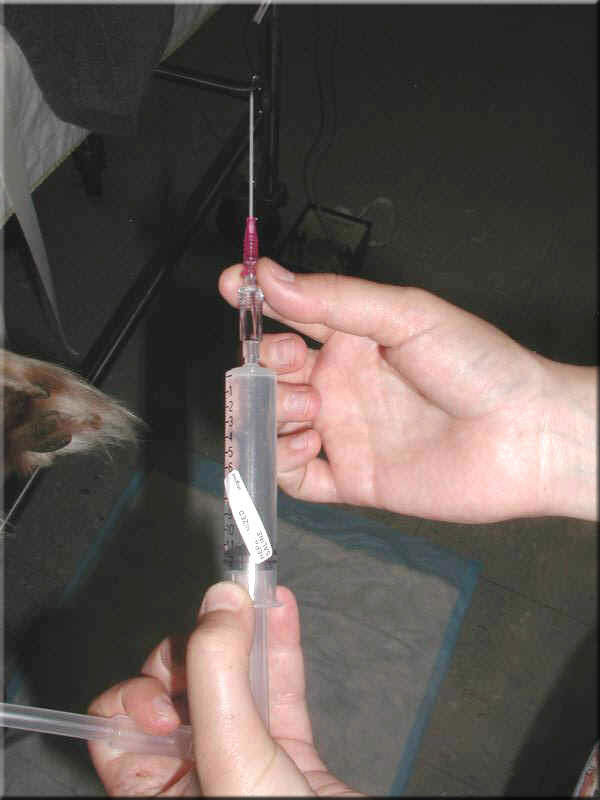
Remove the catheter end-cap and flush the
catheter with hep saline. |
| |
|
|
| |
|
|
| |
|
|
| |
|
 |
| |
|
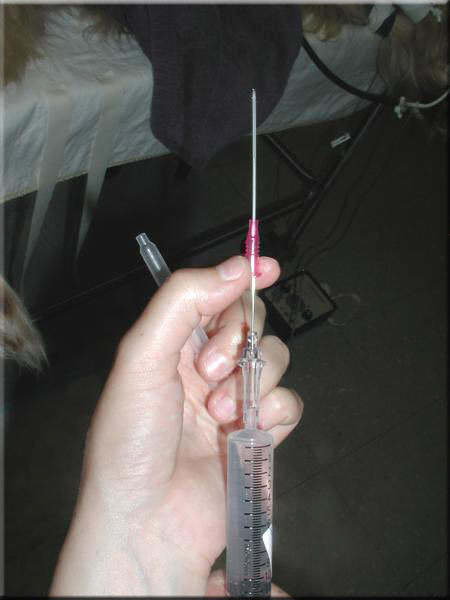
Slide the catheter up the stylet to flush the
inner catheter wall and facilitate catheter advancement once introduced
into the artery. |
| |
|
|
| |
|
|
| |
|
|
| |
|
 |
| |
|
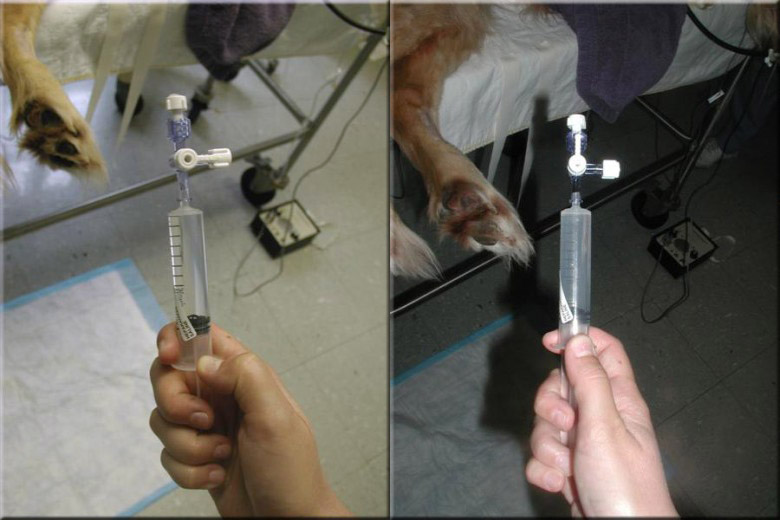
Flush the 3-way stopcock filling both arms. |
| |
|
|
| |
|
|
| |
|
|
| |
|
 |
| |
|
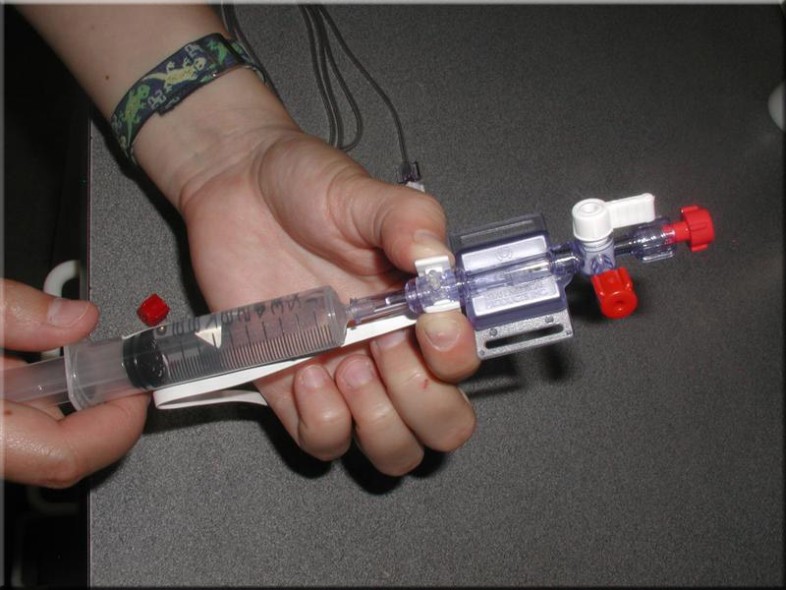
Next fill the transducer with hep saline
making sure no air bubbles are present. Initially flush through the
perpendicular arm of the 3-way stopcock. |
| |
|
|
| |
|
|
| |
|
|
| |
|
 |
| |
|
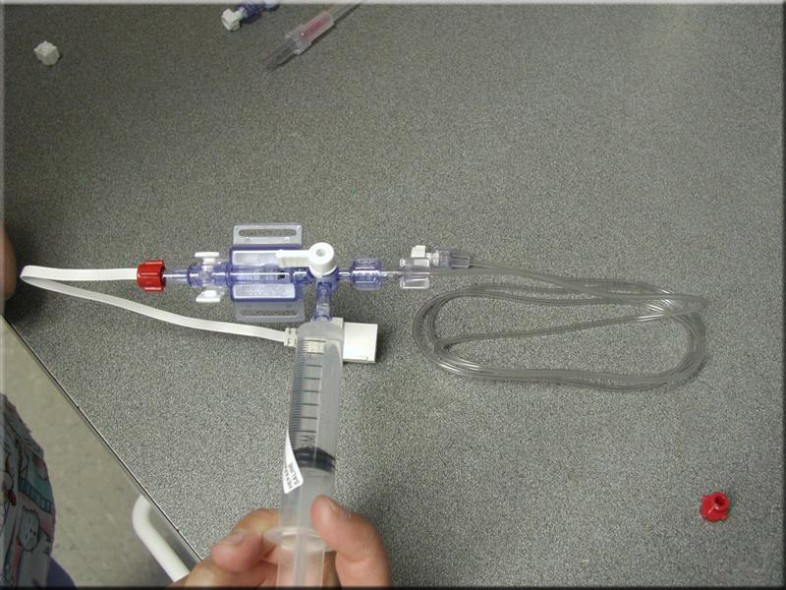
Then attach the pressure tubing to the
stopcock and transfer the hep saline syringe to that perpendicular port.
Rotate the valve to direct flow into the tubing and flush with hep saline.
Now you are ready to place the arterial catheter. Keep all ports and
fittings covered with sterile caps. |
| |
|
|
| |
|
|
| |
|
|
| |
|
 |
| |
|
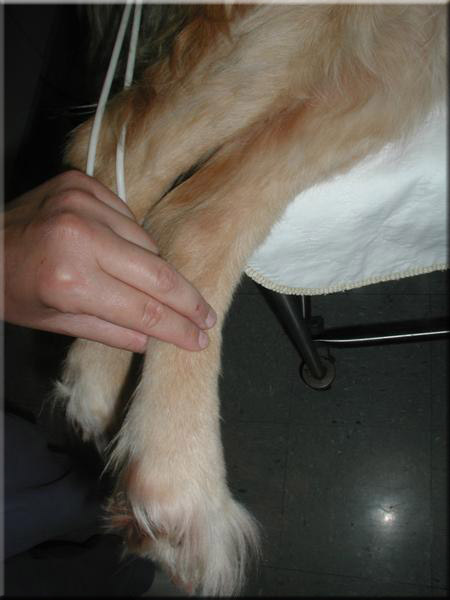
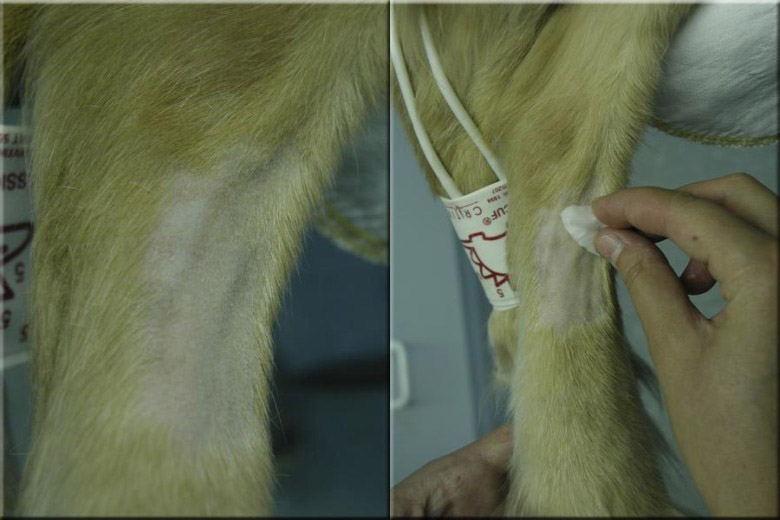
The most common site for canine direct
arterial blood pressure monitoring is the dorsal pedal artery. This artery
is usually palpable over the dorsum of the metatarsal area. |
| |
|
|
| |
|
|
| |
|
|
| |
|
 |
| |
|
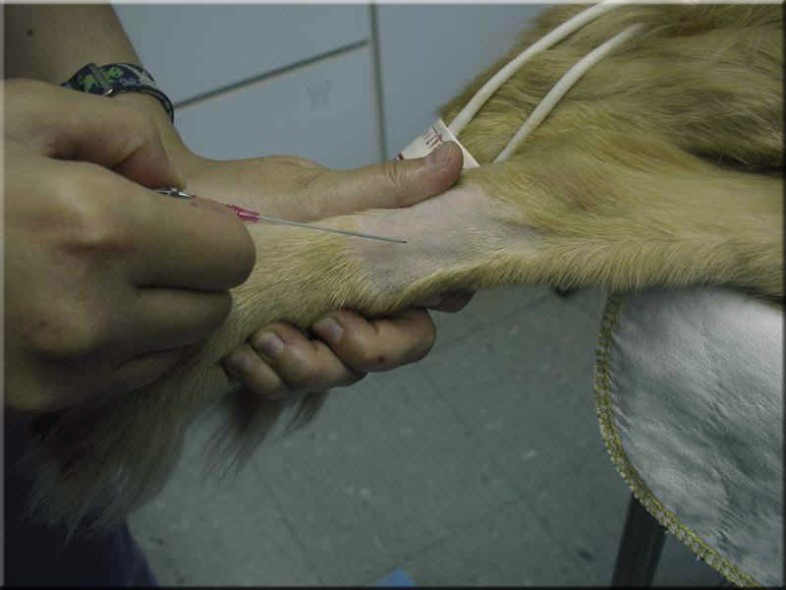
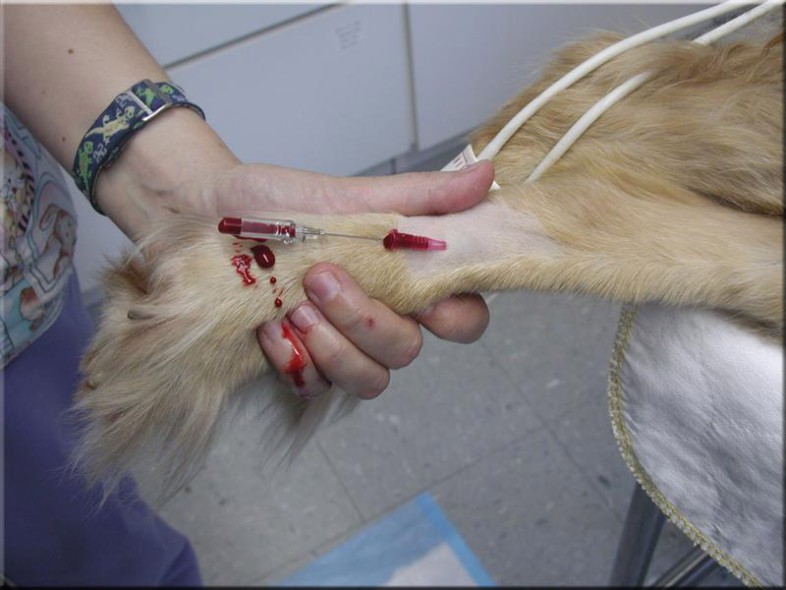
A small area is clipped and prepped over the
arterial site. |
| |
|
|
| |
|
|
| |
|
|
| |
|
 |
| |
|
|
| |
|
 |
| |
|
An absorbant pad is a good idea below the
catheterization site. |
| |
|
|
| |
|
|
| |
|
|
| |
|
 |
| |
|
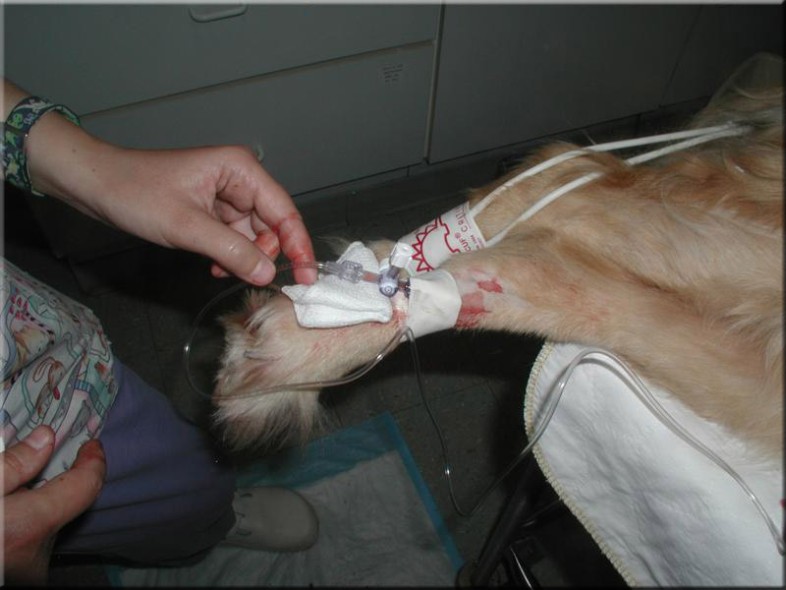
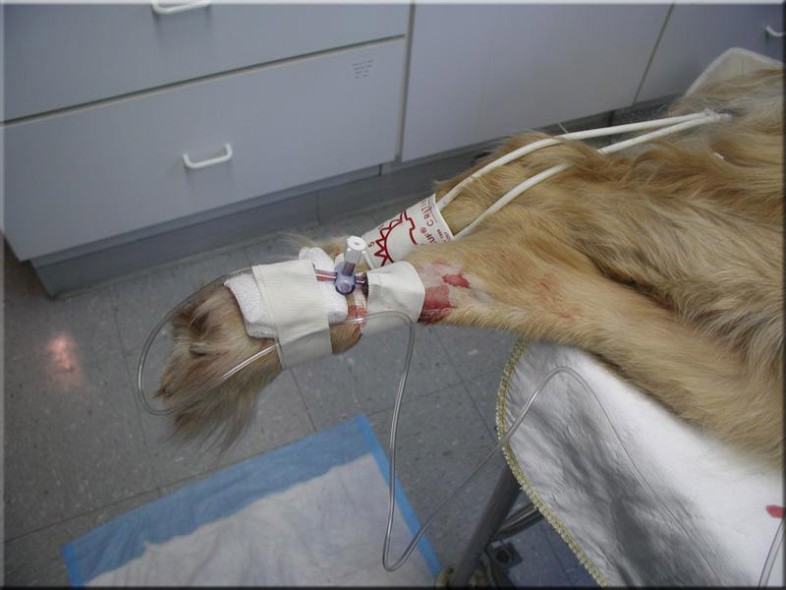
The 3-way stopcock and tubing are attached. |
| |
|
|
| |
|
|
| |
|
|
| |
|
 |
| |
|
And secured into place. The opposite end of
the tubing is attached to the pressure transducer which should already be
secured to the monitor cable. If the patient connections are not
adequately secured large volume blood loss can occur in a short period of
time. This is especially concerning as this site is usually tucked away
under draping out of site. |
| |
|
|
| |
|
|
| |
|
|
| |
|
 |
| |
|
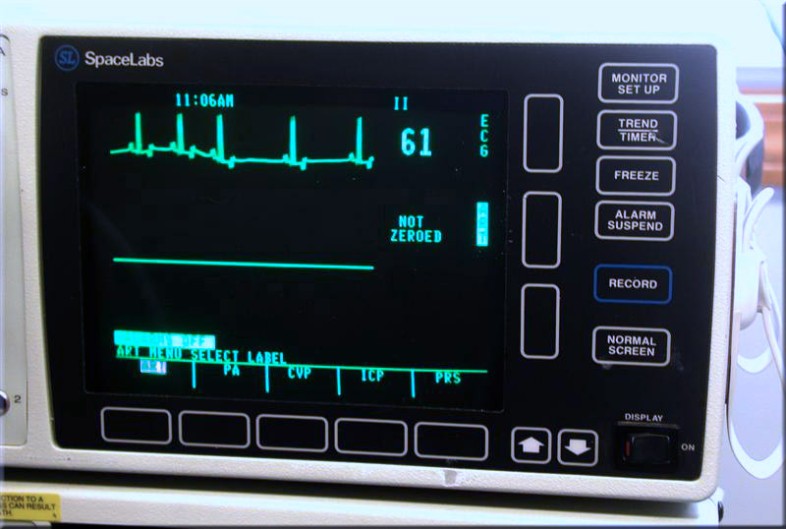
Typical monitor display. Select ART for
arterial blood pressure monitoring. |
| |
|
|
| |
|
|
| |
|
|
| |
|
 |
| |
|
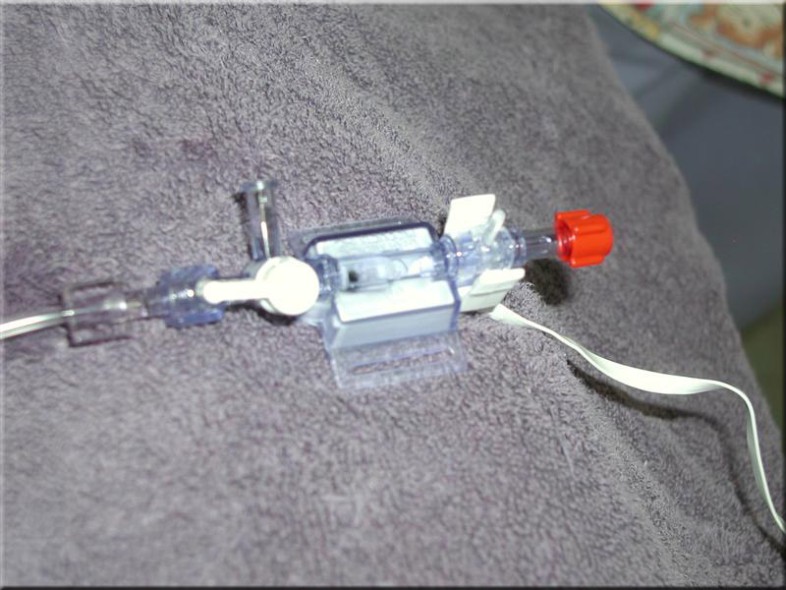
Rotate the valve to expose the tranducer
chamber to normal atmospheric pressure. The transducer should be zeroed
and maintained at heart base level. |
| |
|
|
| |
|
|
| |
|
|
| |
|
 |
| |
|
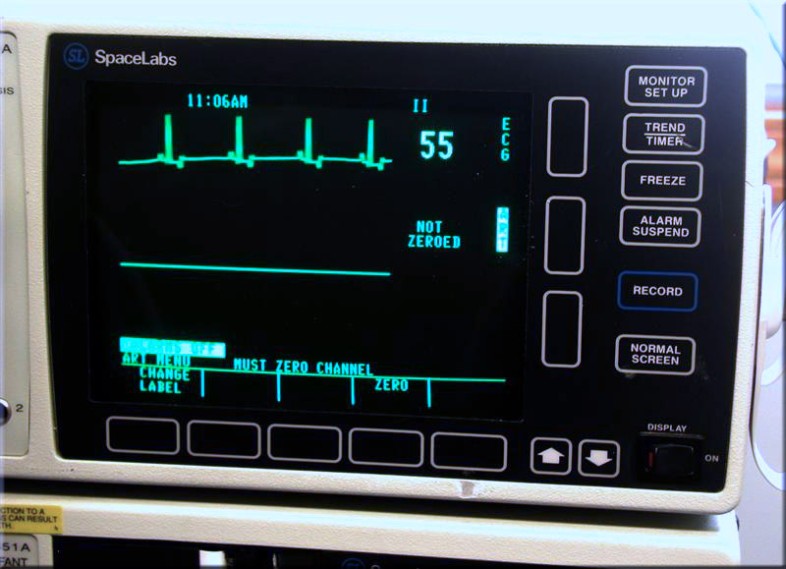
Then press the zero button. |
| |
|
|
| |
|
|
| |
|
|
| |
|
 |
| |
|
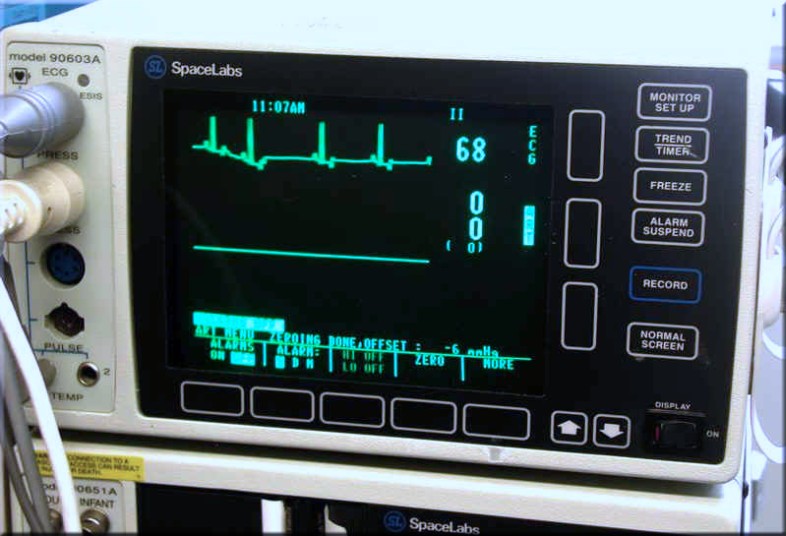
The display should read zero. Attach a hep
saline syringe to the open 3-way valve port at the transducer, rotate the
valve to close flow to the transducer and flush the tubing and catheter.
Then rotate the 3 way valve to allow continuity between transducer chamber
and the arterial catheter. |
| |
|
|
| |
|
|
| |
|
|
| |
|
 |
| |
|
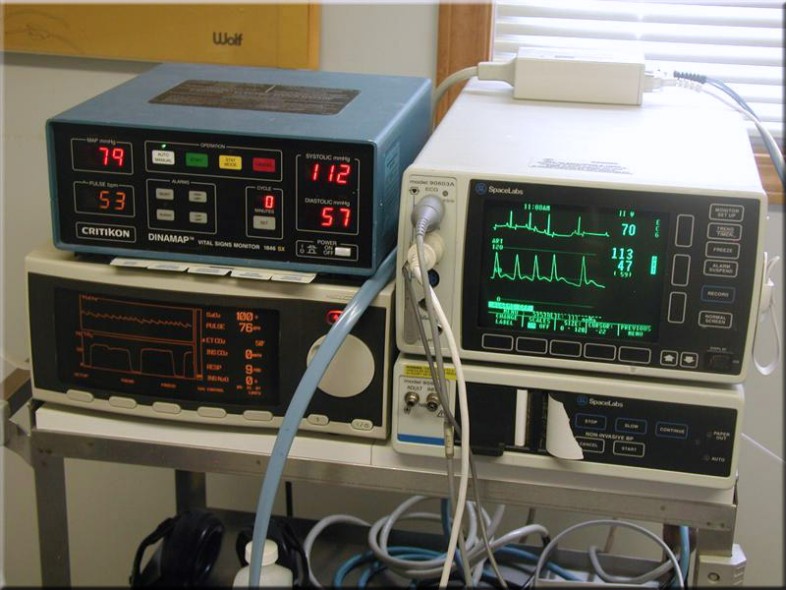
You should see a well defined waveform. If
the wave form dampens over time, repeat the flush, being attentive to the
total hep saline volume used during the procedure. |
| |
|
|
| |
|
|
| |
|
|
| |
|
 |
| |
|
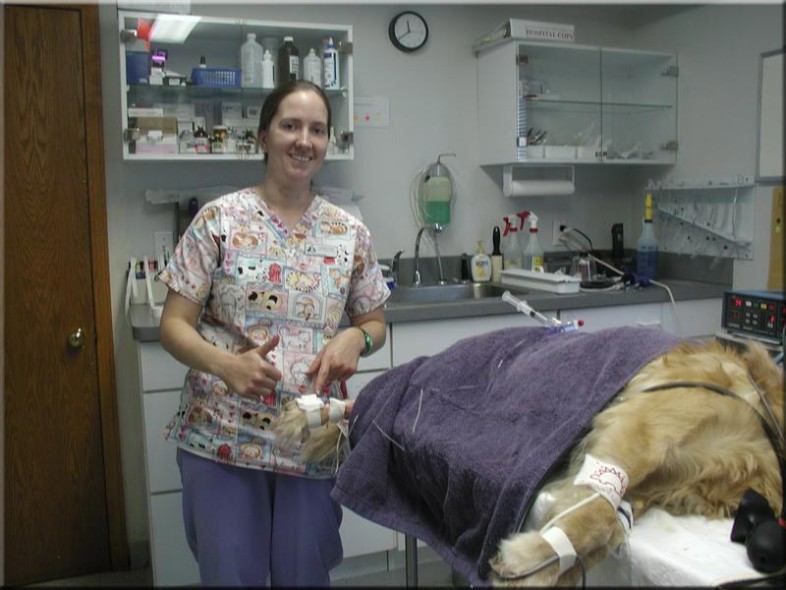
A big thumbs up for a well placed
art line. |
| |
|
|
| |
|
|
| |
|
KEY POINTS |
| |
|
-
The transducer should be zeroed and maintained at
heart base level (sternum level if in lateral, point of the shoulder
if in dorsal or ventral recumbancy) for the most accurate
results.
-
The fluid line needs to be flushed periodically (and
whenever the pulse wave dampens) to avoid clot development at the
catheter site.
-
If the flush fluid flows easily but very low pressures
register immediately check the arterial catheter site for poor
connections/hemorrhage.
-
Be conscious of hep saline fluid volumes administered
during flushing - especially in smaller or CV compromised patients.
|
| |
|
|
| |
|
|
| |
|
|
| |
|
Supplies |
| |
|
The blood pressure transducers, blood
pressure monitor cables, high pressure arterial monitoring lines, and
3-way luer lock stopcocks shown on this page were obtained from Utah
Medical Products; http://www.utahmed.com/criticalcare.htm |
| |
|
|
| |
|
|
| |
|
|
| |
|
Additional Resources |
| |
|
1. Direct
Blood Pressure Monitoring. Raffe MR. 2005 IVECCS Proceedings.
2. Direct
Blood Pressure Monitoring. Waddell LS. Clin Tech Small Anim Pract. 2000
Aug;15(3):111-8. |
| |
|
|
| |
|
|
| |
|
|
| |
|
Return to top of page |
| |
|
|
| |
|
|
| |
|
|
| |
|
|
| |
|
|


